Ever wanted to make a cute food character with some punny text? This blog will show you how…
Ever wanted to make a really cute illustration of food that will make people smile? Well, that’s what I do all the time and it’s my favorite way to spend an afternoon illustrating. Not only do I enjoy making these cute characters, but I love that people enjoy seeing them in their social feeds and that something I’ve drawn can brighten their day.
So, how do you go about creating a cute food illustration? This blog will show you how so you can make a fun food character that will make people smile. We can all use more smiles, right? So read on to see the steps on how to get started.
Get Inspired and Choose Your Food
It’s a bit hard to decide what to draw when you’re looking at a blank screen with the white page just blinking at you. That’s why I recommend looking on Google image search or Pinterest to peruse some images and get your creative juices flowing. You can type in “food photos”, or be more specific, like “fruit images” or “pizza images” to narrow it down. Remember, these images are inspiration, so use them to inspire your own image and take on that food item. Remember you can also get inspired around the house in your fridge or cupboards, or at the grocery store or farmers’ markets!
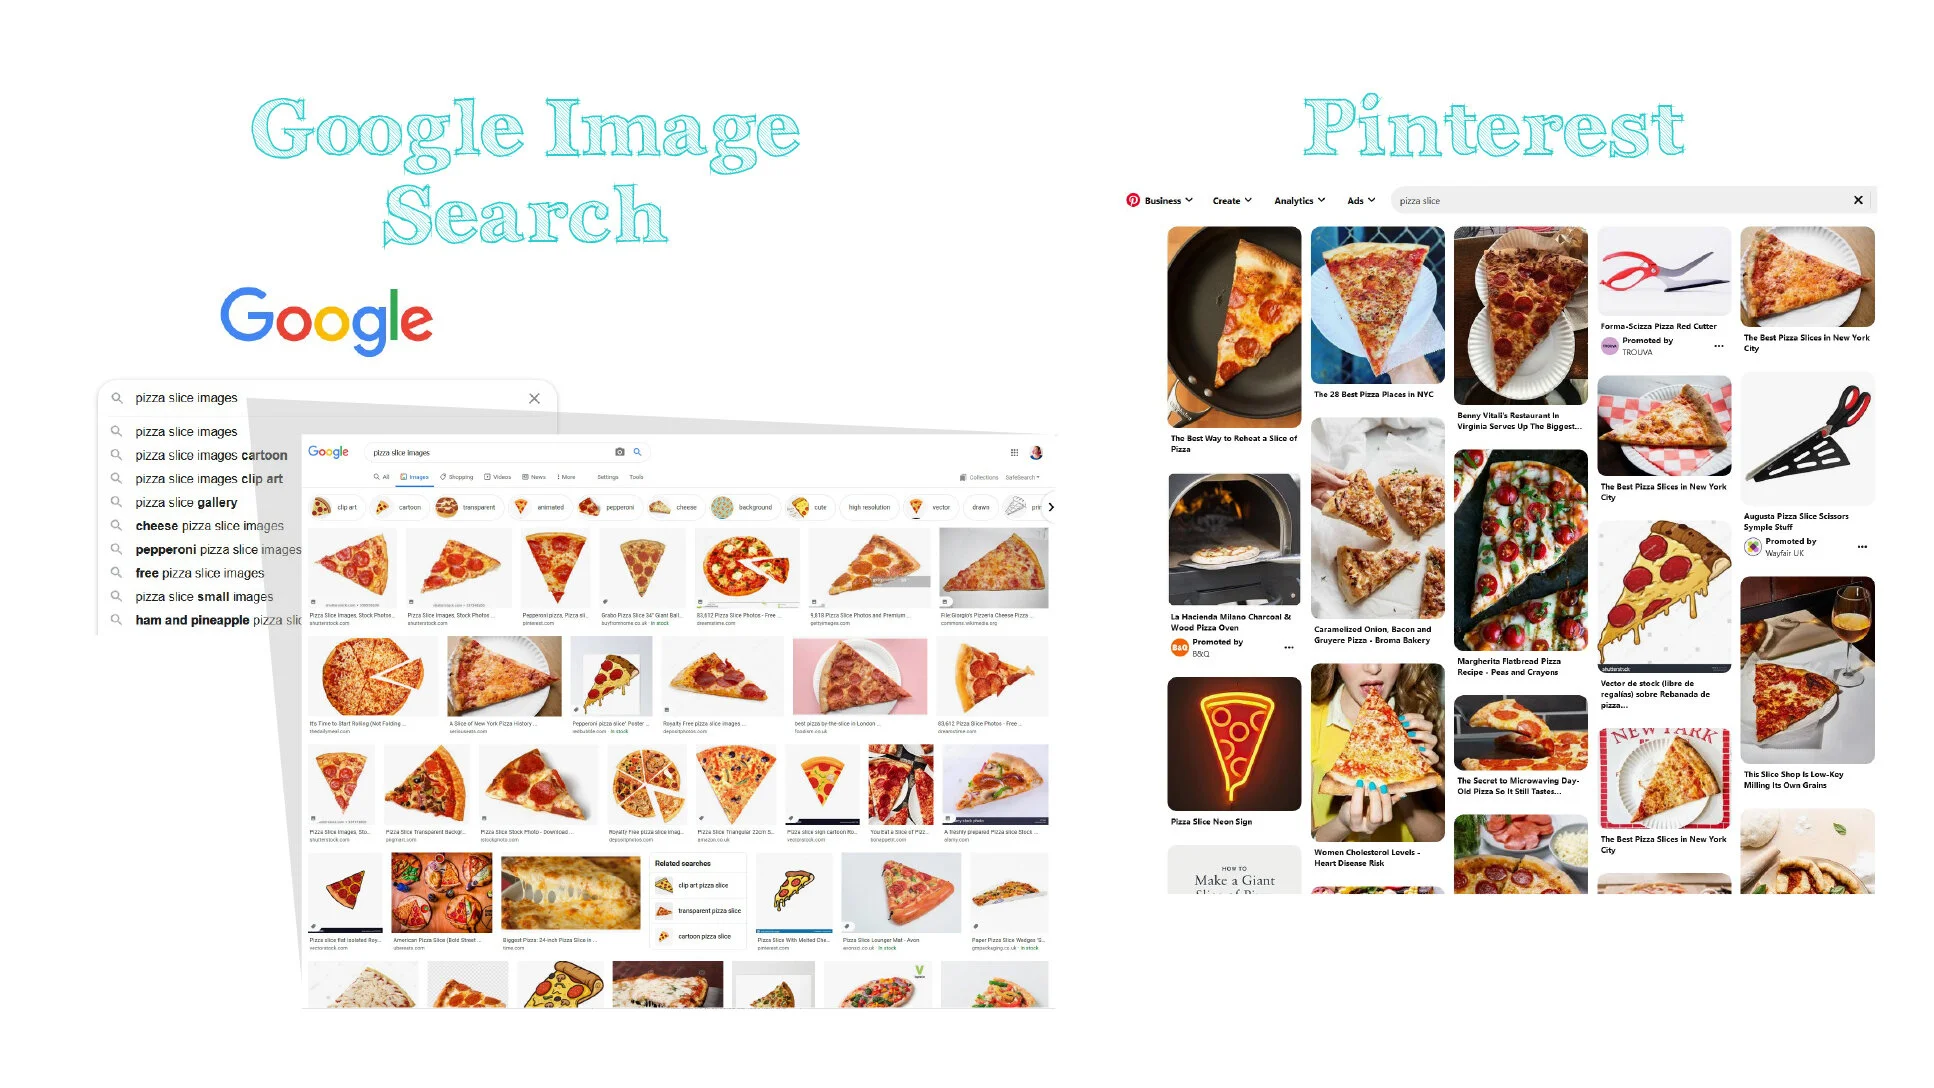
Search for foods for inspiration using Google, Pinterest, or around your own house or neighborhood.
Once you’ve selected a food, do a little research into text you might want to pair with it. If it’s a pear, perhaps you can say “No one com-PEARS to you” or “We make a great PEAR”. For help with choosing a fun or punny text phrase to go with your food, my favorite source is Punpedia.org. You can also search “Pear puns” or similar on Google to get some great sources. Remember that some puns can be copyrighted, so it’s best to come up with your own rather than copy something directly that you’ve found. Innovation is always the best!
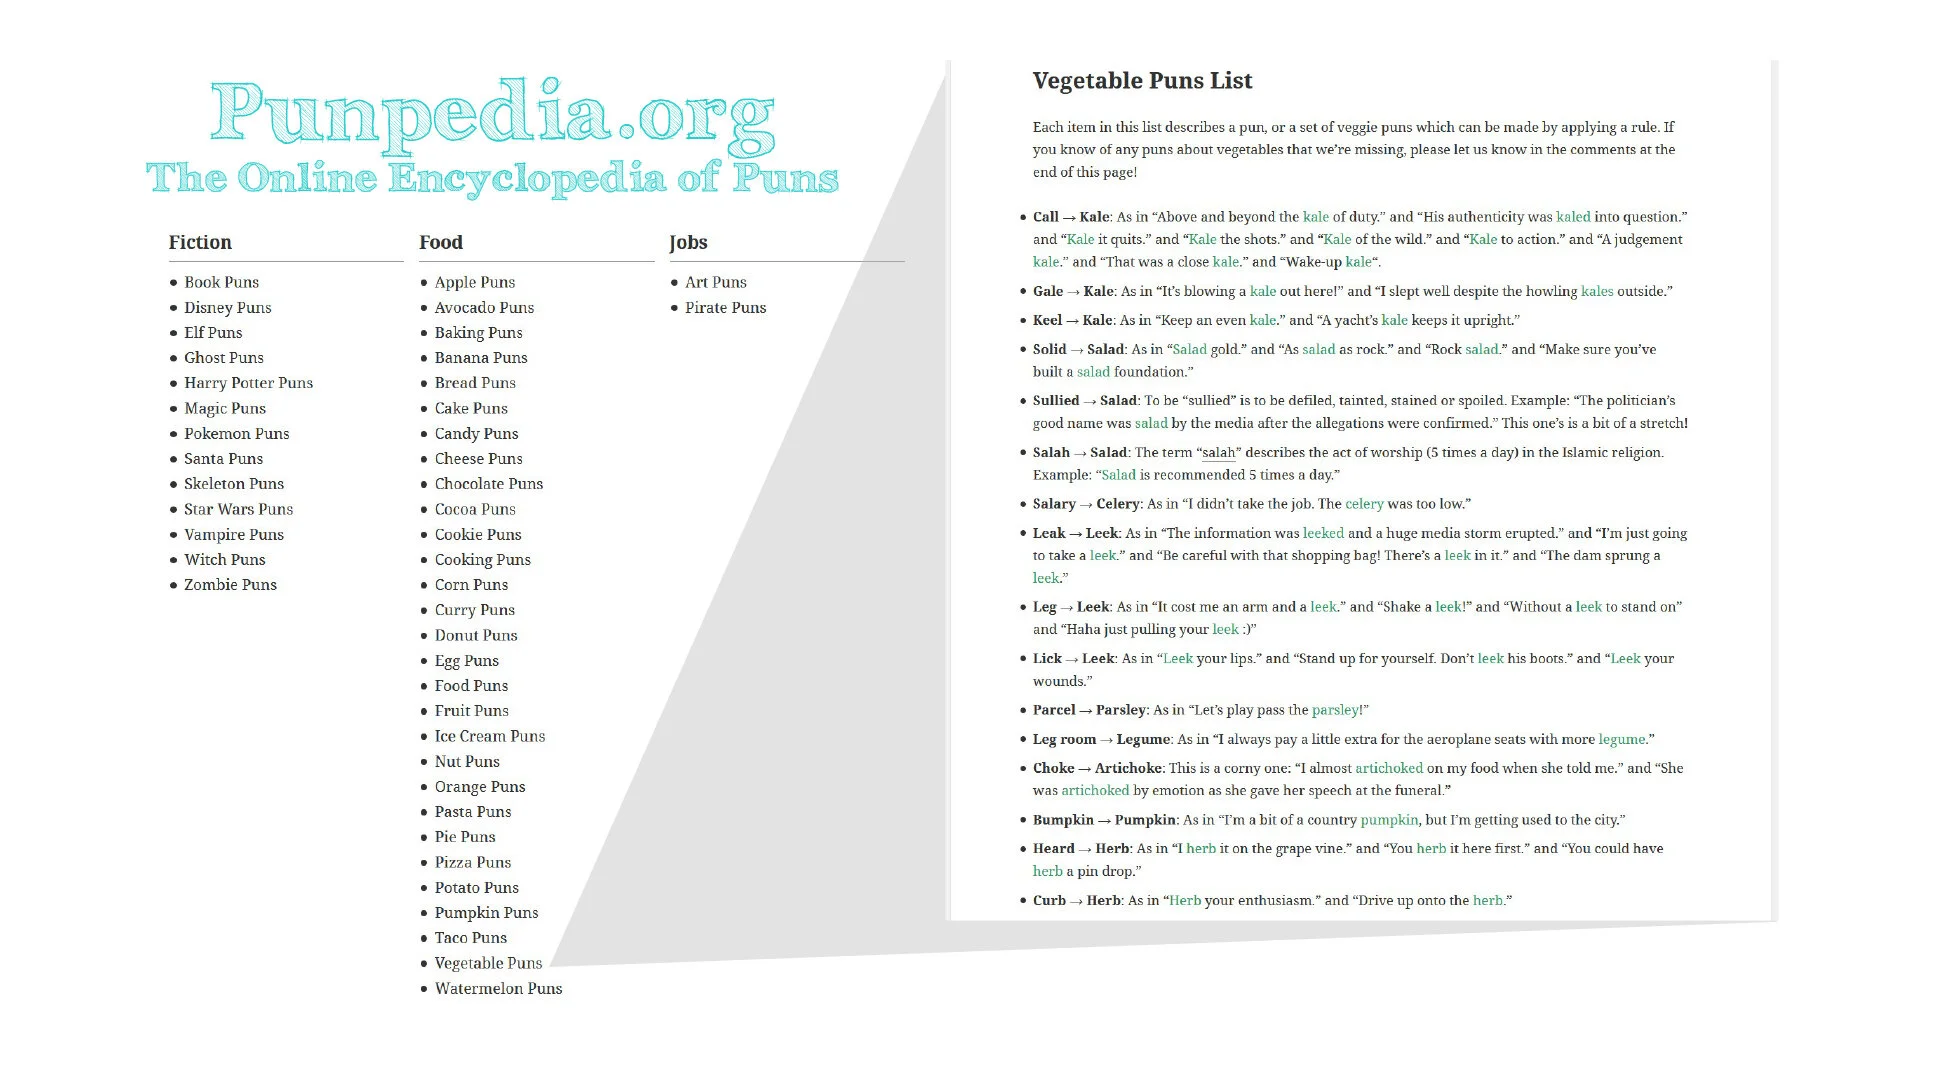
Search on Punpedia.org for the perfect text, or do some Googling to find the phrase that fits your food perfectly.
Draw Your Food and Add Some Personality
Now that you’ve selected your food, simplify it to the most basic shapes and features, and start your sketch. The most important thing to add to your food is a face. Eyes and a mouth are a definite must to give your character some personality and an expression to suit the mood. You can use lots of different shapes for eyes, from simple dots to large circles with dark pupils. The same goes for the mouth, it can be a simple line, or can be a full open mouth with teeth and a tongue. Choose the features to help show an expression and personality for your character.
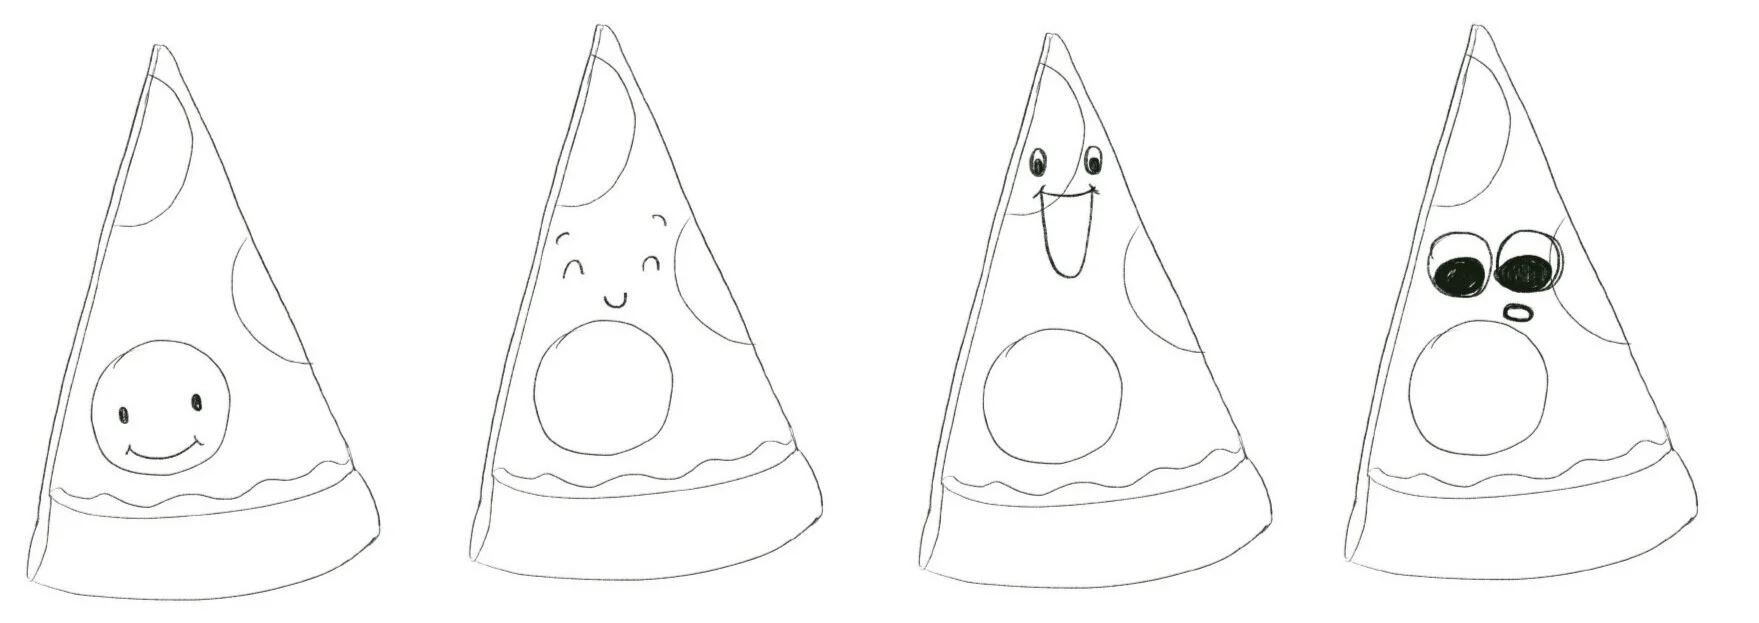
There are lots of options for faces, including different eye shapes and mouth shapes. Add a nose if you like as well!
You can also add arms and legs, or omit them--arms or legs can help your food look like it’s doing something or holding something if that suits your text, but they aren’t necessary to create a cute food character that still conveys some fun. Lastly, you can also add props or extra details, like sunglasses, hair, or have your character holding a book or wearing a hat. These fun details will really flesh out your character and help it to come alive.
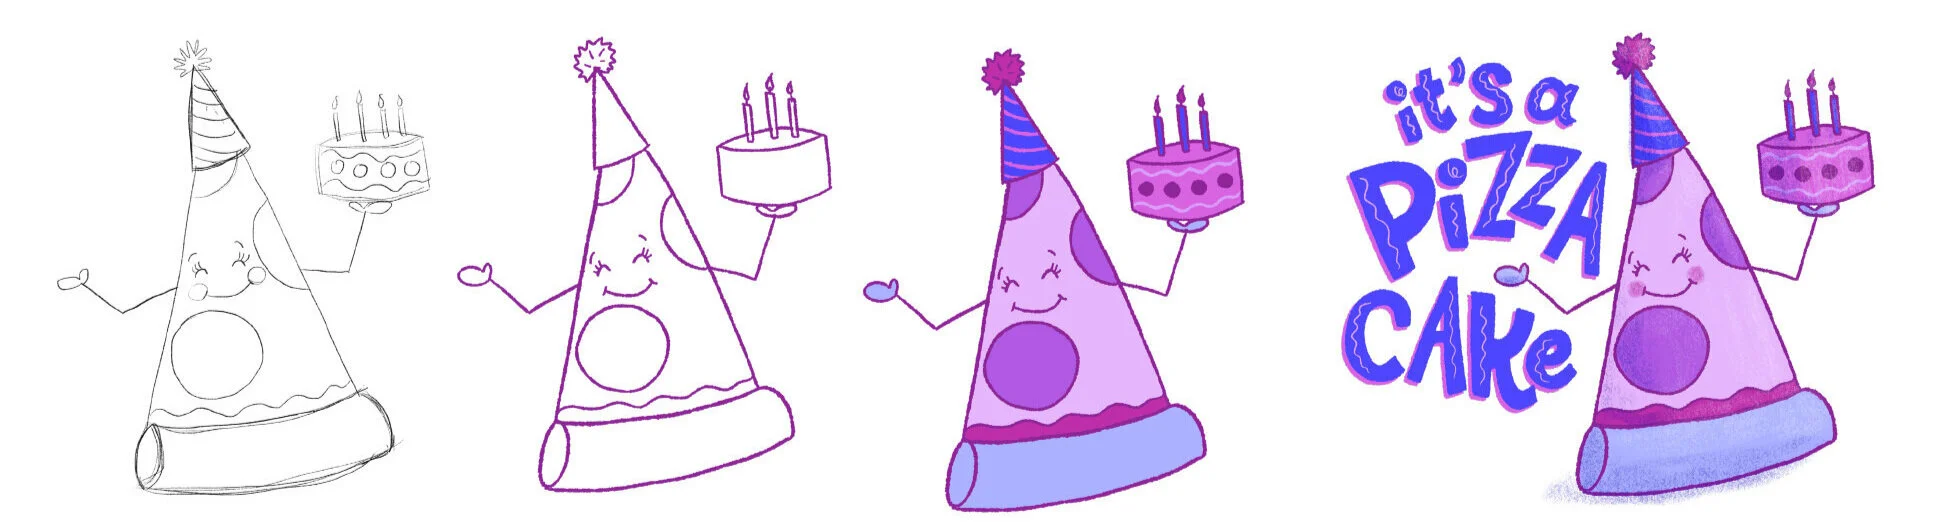
Start by sketching out your food and add a face, some arms and legs if needed, and maybe some fun props or details. Then draw your food, add color, and finish with text! Fun!
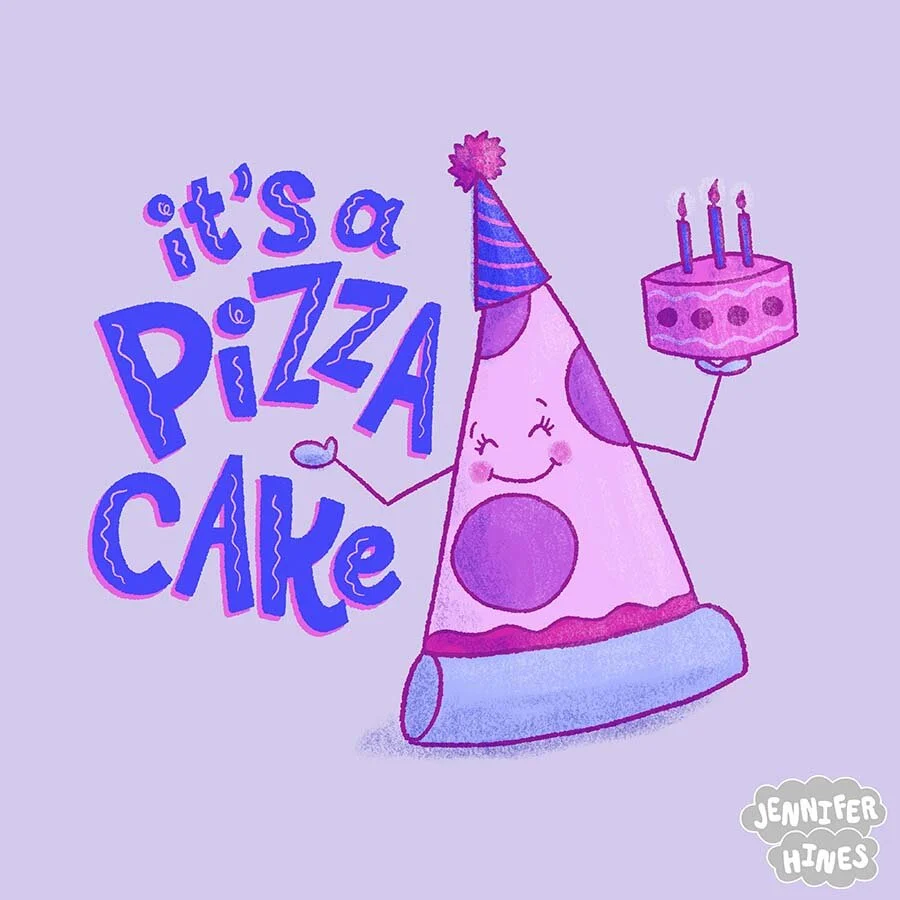
The last step is to add your text. You can add it as a simple headline or caption above or below your drawing, or draw it in as part of your character, like a speech bubble. I enjoy creating chunky lettering around my character as shown in my pizza example here. Whatever you choose, the text will create the full picture and add the funny element to illicit smiles wherever your cute food illustration is encountered.
Go Deeper
For a more in-depth tutorial on how to create a cute illustrated food character, I’m happy to run a custom workshop for you and your team or group of friends. Send me a note and we can discuss.