Learn brush lettering basics with this blog post covering basic materials, strokes, and more.
Ever wanted to learn how to use brush pens to do brush calligraphy? Well, it’s easy to get started, it just takes practice. This is part 1 of a series to get you going creating your own brush pen calligraphy and lettering. Stay tuned for future parts in this series.
Materials
The best pen for beginners are Tombow Dual Brush pens in a dark color. These are bigger, so you can work larger. The thin tip on the other end is great for smaller text, like addresses on envelopes. Not all brush pens will feel the same, so as you get started I recommend also trying out some to see which you like best—art stores are great for this because they usually have testers that you can draw with before you buy.
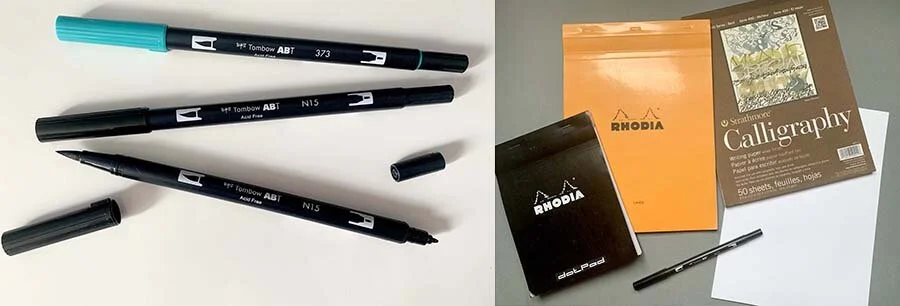
Tombow pens are great for starting out, and any smooth paper will work to write on.
For paper, smoother paper is better for keeping your pens in good shape because textured paper will tear up your pen tip, giving you fuzzy lines. You can use regular printer paper, smoother lined or dot grid paper, or even tracing paper for practice. For final projects, you can invest in a very smooth calligraphy or watercolor paper—just make sure it is smooth so your strokes go down evenly.
Holding the Pen
Hold your pen at roughly a 45 degree angle, so a bit on the side of the full felt tip so you can use more than just the point.. You don’t want to hold the pen perfectly vertical or when you press you’ll just squish your tip! You basically use the edge of the pen to make marks instead of just the point.
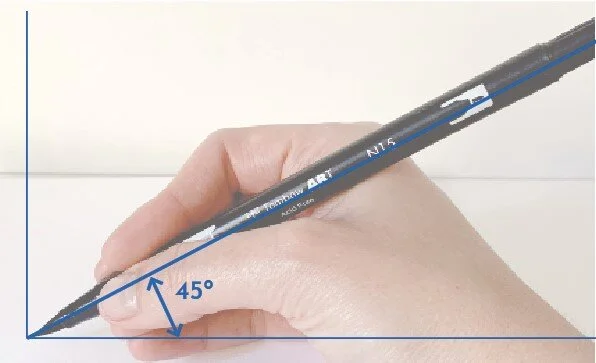
Hold your brush pen at approximately a 45 degree angle so that you can press down and use the edge/side of the felt tip, not the pointy part.
Up vs. Down
Remember that Up is thin and Down is thick. Up strokes and horizontal strokes where you are pushing the pen up or across the page are thin, and you barely press down. Down strokes are thick because you are pulling the pen down the page and towards you and applying heavy pressure.
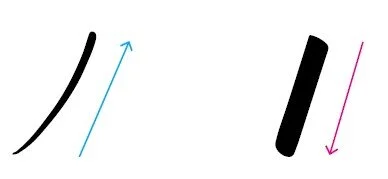
Press slightly for up strokes to keep them thin, and harder for down strokes to use the edge of your pen felt tip to get a thick line.
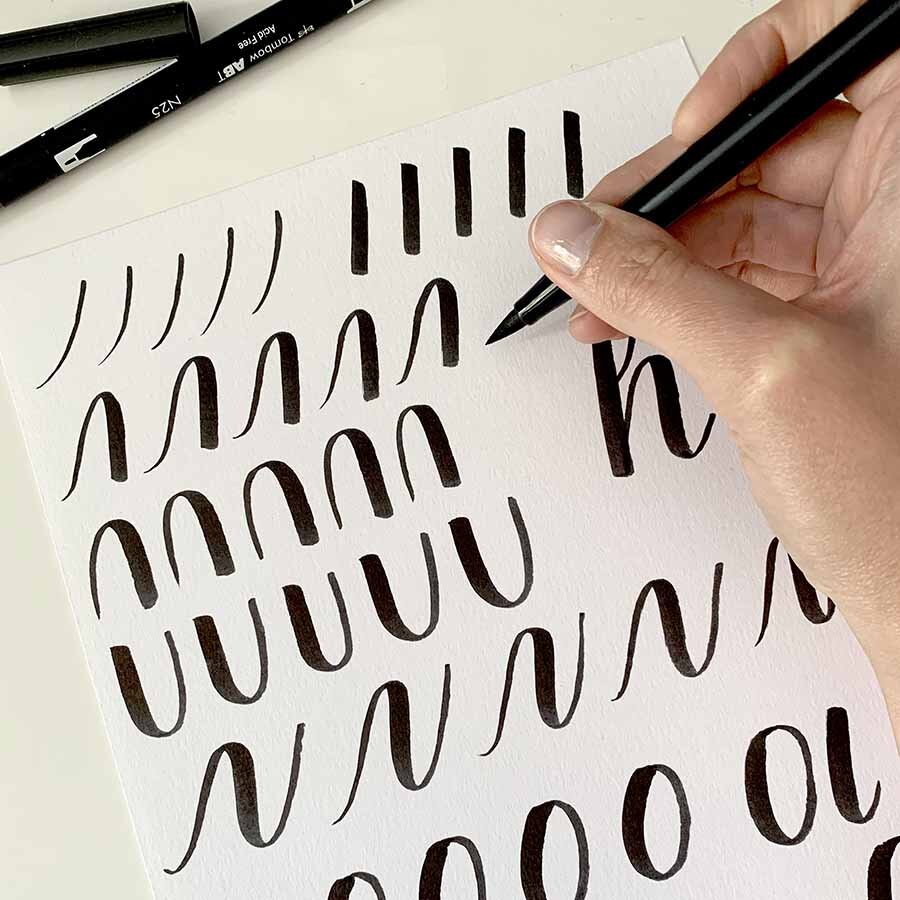
Basic Strokes to Practice
There are some basic strokes that you can practice to get your skills down. The biggest part of learning brush lettering is learning how to use the pen, apply consistent pressure, and create the same strokes consistently. These are just a few basic strokes to get you started, but the next installment of the blog will feature more strokes that are a bit more challenging.

The Down stroke, Up stroke, Hill, Valley, and Squiggle strokes.
Downstroke: start at the top and move down, pressing firmly for a thick line
Upstroke: start at the bottom and move up, pressing lightly for a thin line (more challenging than it seems!)
Hill: combine the up and down strokes
Valley: combine the down and up strokes
Squiggle: combine the strokes for up, down, and up again
Go slow, much slower than you think you need to go. It’s much easier to get consistent lines, especially when you’re just starting out.
Keep Practicing!
Creating beautiful letters is all about practicing. Even just 5-10 minutes a day of doing the basic strokes over and over will make a huge difference! So keep on practicing.
Part 2 - Getting Started With Brush Lettering
Ready to move on? Well, head on over to Part 2 of this series on beginning brush lettering to learn a bit more advanced strokes and how they form to make letters. Part 3 will dive into the lowercase alphabet, so stay tuned for that.
Additional Resources
If you've enjoyed this short tutorial, consider signing up for one of my workshops on hand-lettering and illustration, including new brush lettering classes, which can be found on my Workshops page on my website. You can follow me on Eventbrite to get notifications when I announce a new online or in-person workshop and grab tickets before they sell out.